如果想open code directiory from command line, 可以用code command
code Unit-Test-Demo/
What is Jenkins
Continous Integration Tools (CI): All open source
- Bamboo
- Buildbot
- Gump
- Travis: specialized for Github
- Jenkins
Agile
Advantage:
- Client requirements are better understood because of the constant feedback
- Product is delivered much faster as compared to water fall model. You deliver feature at the end of each sprint(typically two weeks) instead of waiting 6 months
Disadvantage:
- The products gets tested only on developer computers and not on production systems
- Developers and operations team work in silos. It is difficult if two teams not work together
Before Jenkins
Different developers working at different locations and commit to repository different time.
- Issue in integration
- Delay in Testing. Notify if there are bugs => delay
Developers had to wait till the entire software code was built and tested to check for errors. There was no iterative improvement of code and software delivery process was slow
What is Jenkins
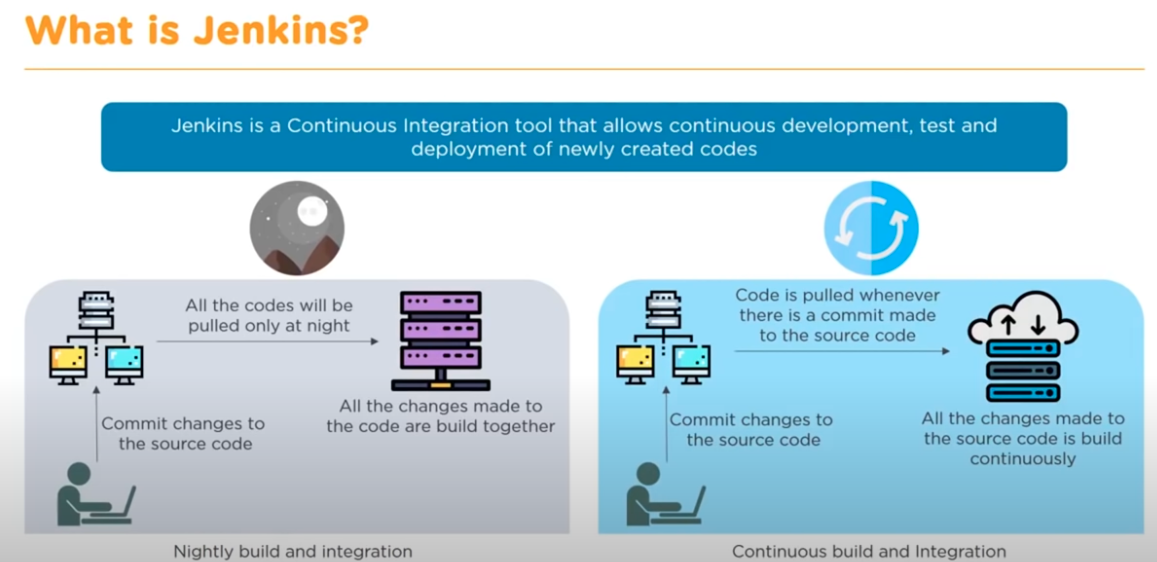
Jenkins is a continuous integration tool that allows continuous development, test and deployment of newly created codes.
Jenkins is an open source automation server written in Java. It is used to automate software development process via continuous integration and facilitates continuous delivery
- Nightly build and integration (Old & legacy approach)
- Continuous build and Integration: put your test and verification services into the build environment. Always run in cycle to test your code
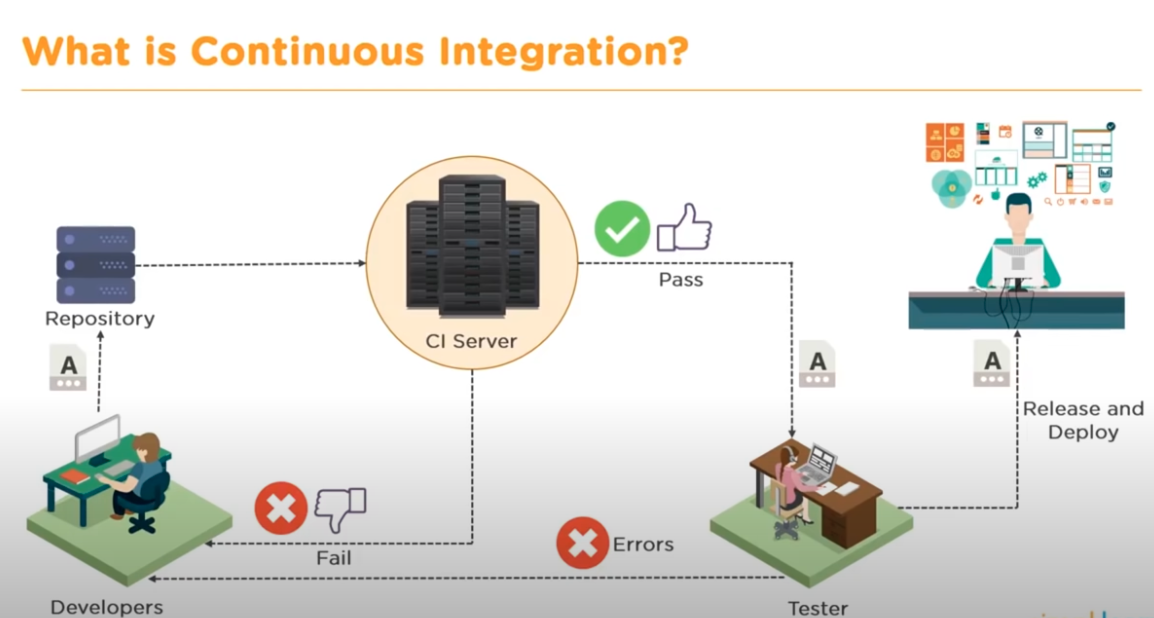
Continuous Integration
At anytime, able to commit into repo. Submit the code into the Continous Integration server. The goal of Continous Integration server is to pass any test that is created. If continous integration server test pass, then that code can sent back to developer. Then developer can make the changes.
It allows developers to do:
- Allow developer not to break the build
- Allow developer not to run all the test locally
Running test costs a lot of time, Can put Continuous Integration server into another environment.It improves the productivity of developer
The goal: let release and deploy faster and let customer to get the code faster. When they got code, it works
Features of Jenkins
- Easy Installation: Jenkins is a self contained Jav-based program, ready to run with packages for Windows, Mac OS X and Unix-like OS
- Easy Configuration: It can be easily set up and configured via its web interface which includes error checks and build-in help
- Plugins: It has hundreds of plugins in the Update Center and integrates with every tool in the CI and CD toolchain
- Extensible: Jenkisn can be xtended via its plugin architecture and provides nearly infinite possiblities for what it can do. (Extend Jenkin not create a customized version of Jenkins)
- Distributed: It can easily distribute work across multiple machines, helping in faster builds, tests and deployments across multiple platforms
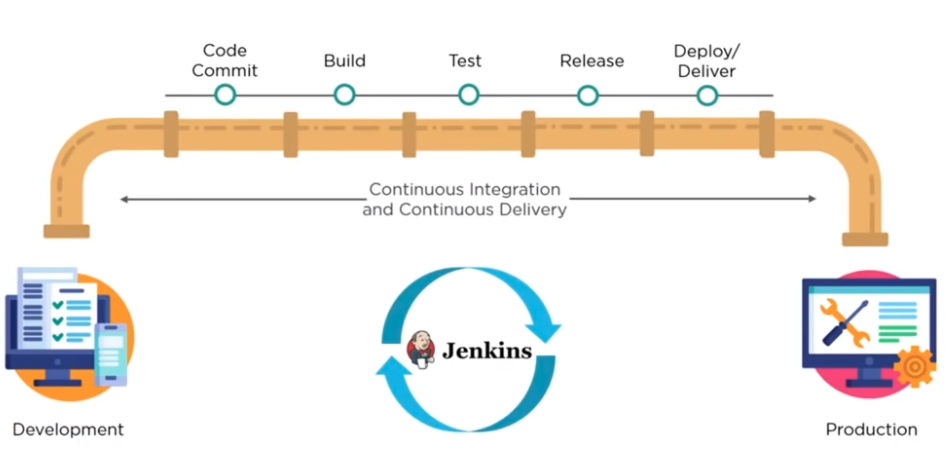
Pipelines
The whole process can be automated
If have different code files. The files could be very large and may require multiple builds. Single Jenkins server cannot handle multiple files and builds.
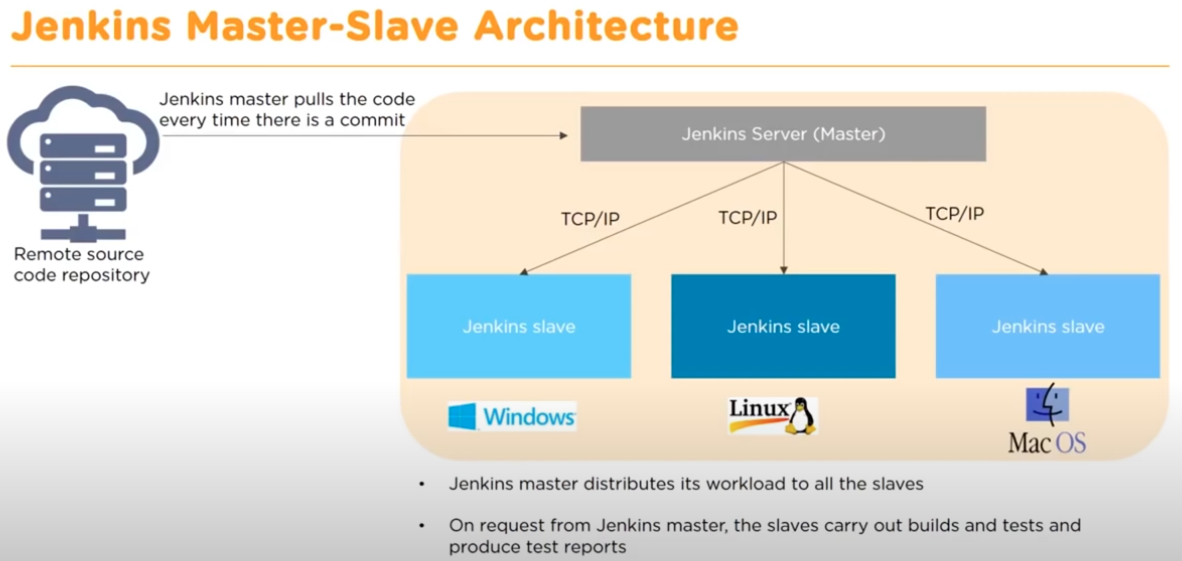
Master-Slave Architecture
Jenkins master pulls the code every time when there is a commit. Jenkin server has multiple master environment then push out to multiple Jenkin slave environment to distribute the workloads. It allows to run multiple builds and test production environment across entire architecture.
Jenkin slaves can run different build version of the codes of different operating system. The server master is controlling how each build operate.
Begin Jenkins
Install Jenkins
brew install jenkins-lts

# if brew not found, run
export PATH=/opt/homebrew/bin:$PATH
Running Jenkins
jenkins-lts
then open localhost:/8080
Jenkins stores all its configuration data, jobs, and project workspace in
- Windows:
C:\Program Files(x86)\JenkinsorC:\User_Home_DIR\.Jenkins - Mac:
/Users/username/.Jenkins/
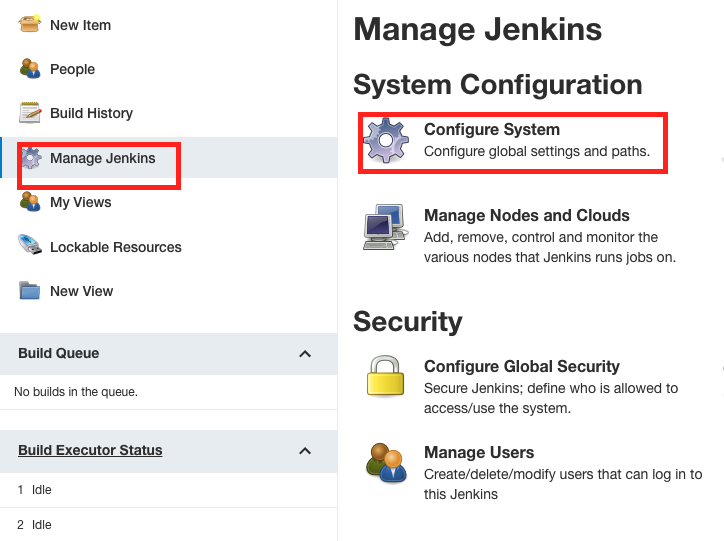
Configure System
Click Manage Jenkins -> then click Configure System
System Message: type any message and it will show up in the menu
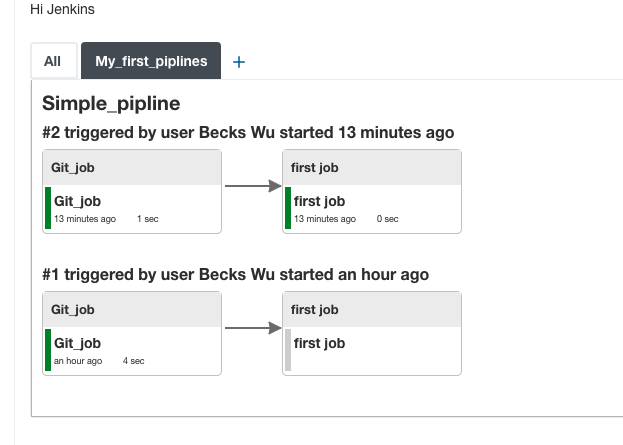
E.g. System Message: Hi Jenkins. It shows as below
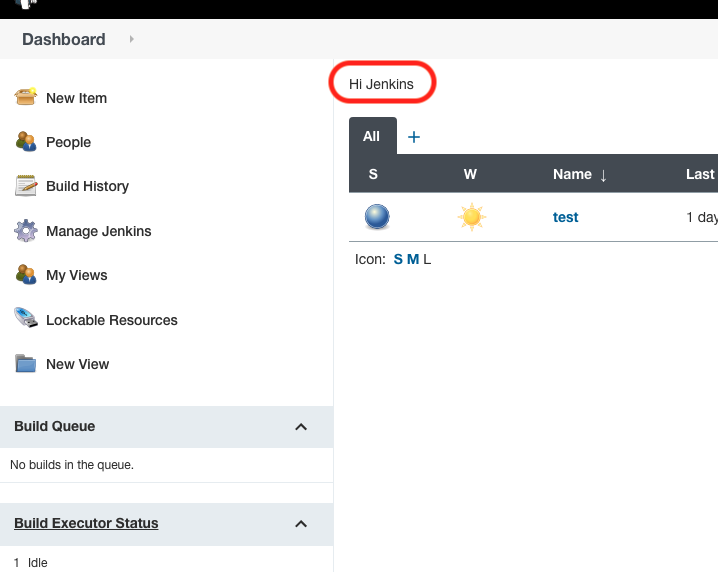
# of executors: How many jobs/thread can be run on this particular instance. As a thumb rule, if on a single core system, the number of executors is 2. Even if the number of jobs bigger than #of executor, they will all get queued and eventually done this job.
- Whenever there is a new job get triggered. The CPU usage and memory usage in terms of disk write is very high in the Jenkins system.
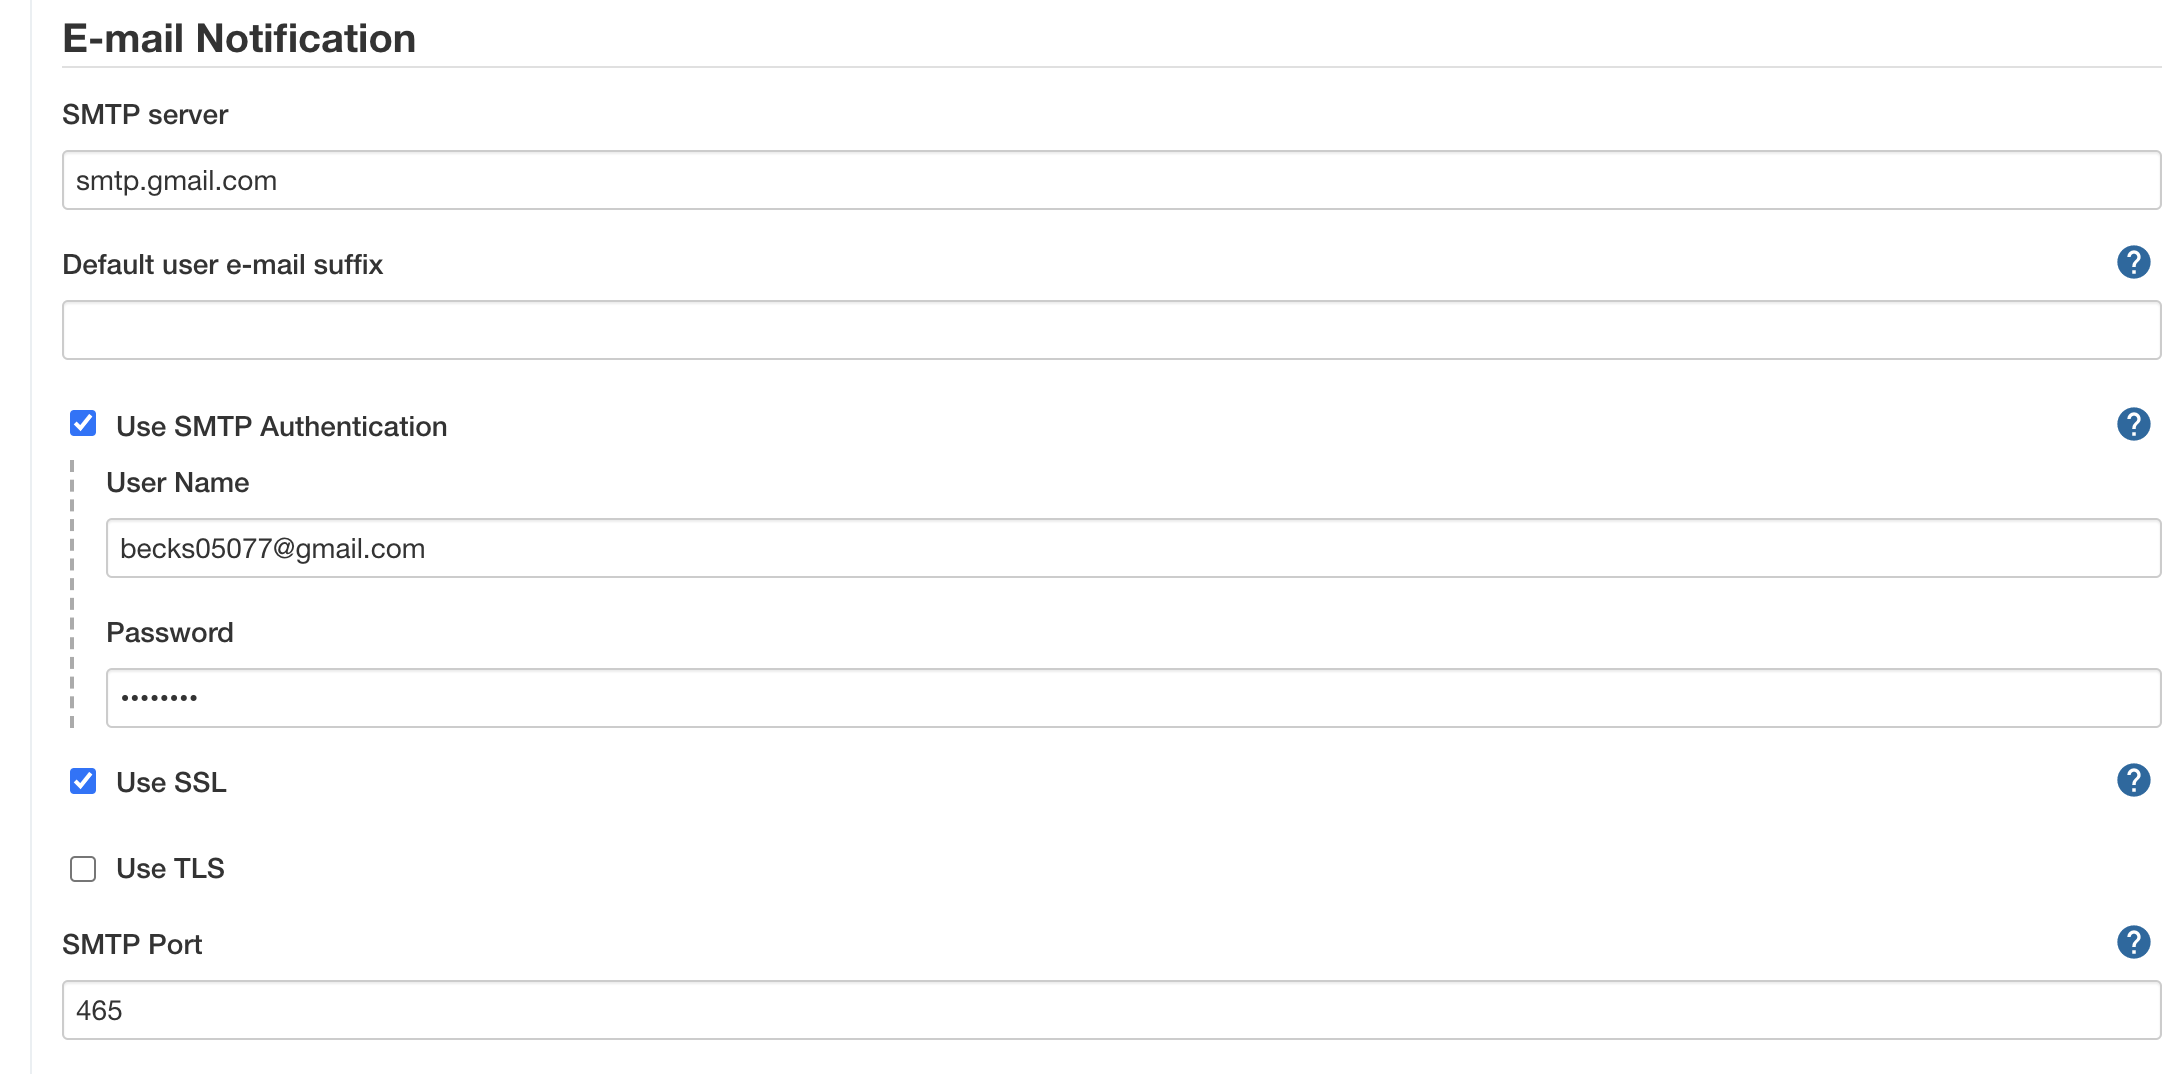
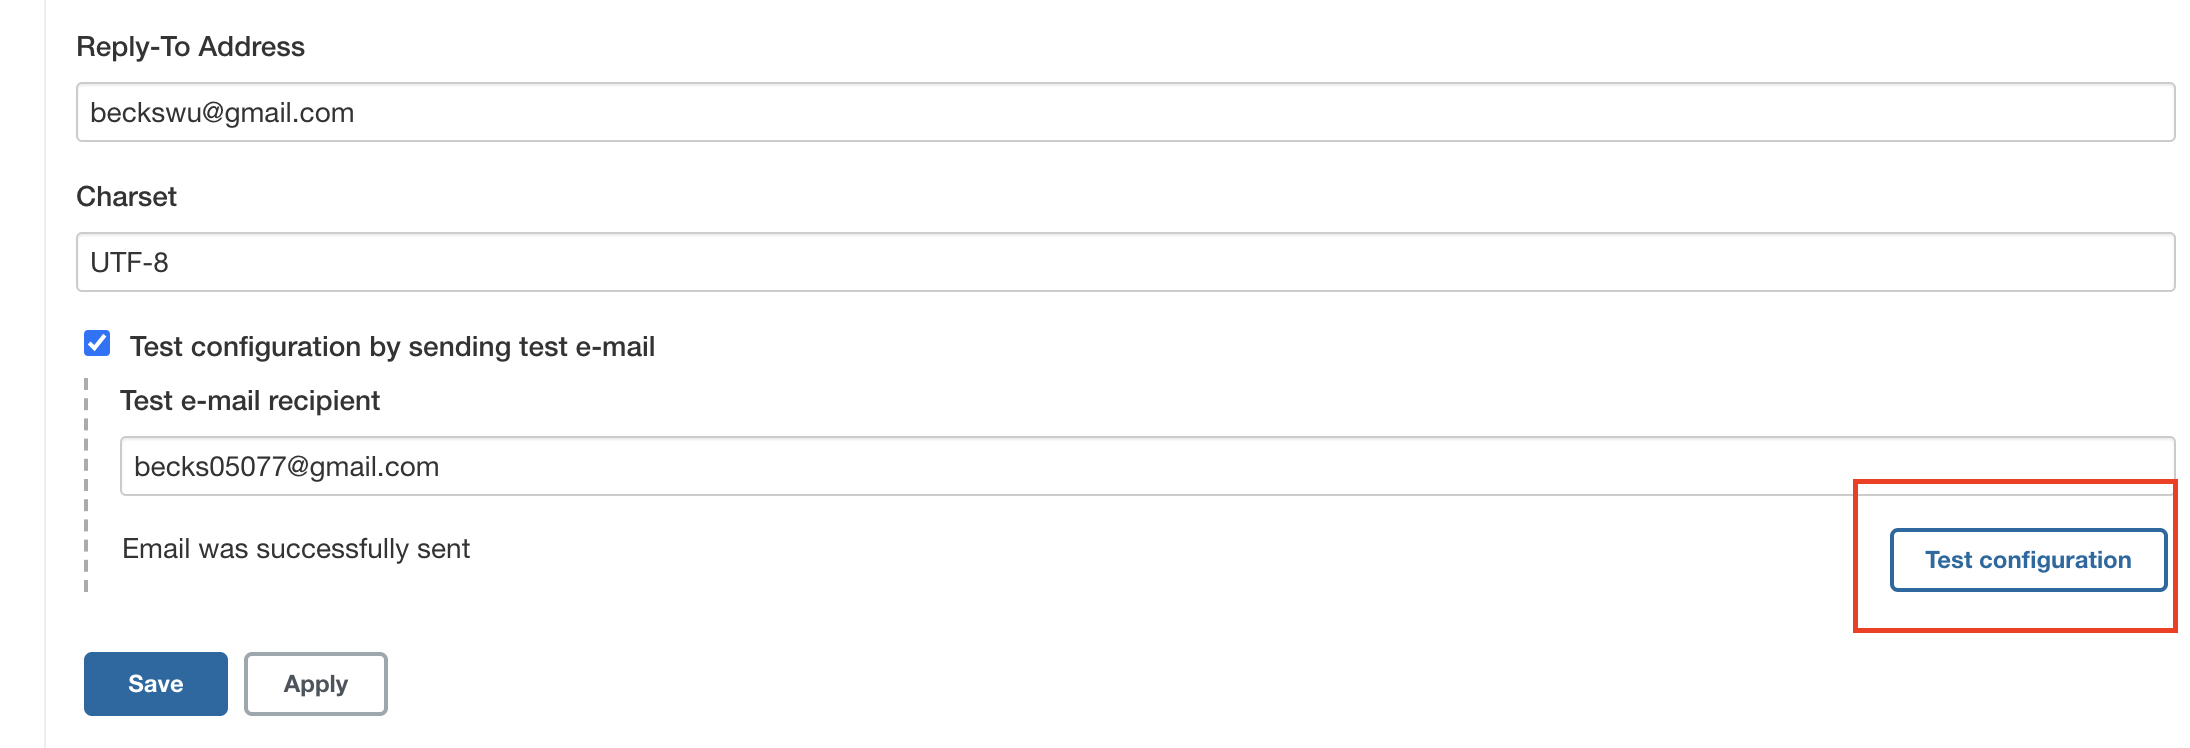
Sending Email
If has error for testing sending email, [check here](https://stackoverflow.com/questions/35347269/javax-mail-authenticationfailedexception-535-5-7-8-username-and-password-not-ac?answertab=votes#tab-top)
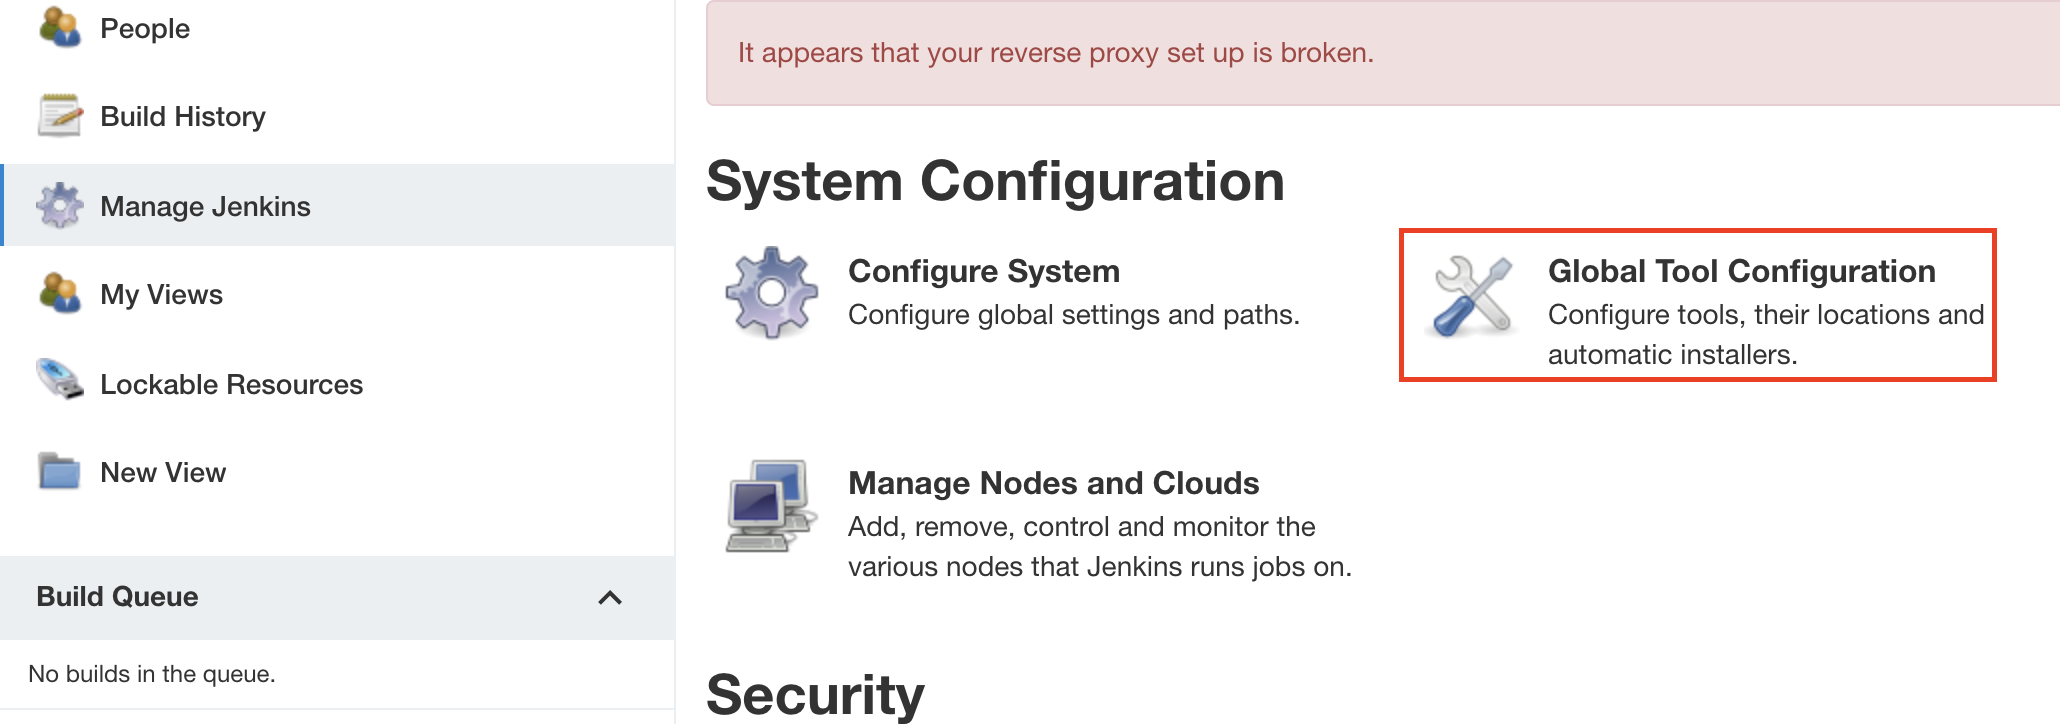
Global Tool Configuration
Jenkins is a Continuous Integration Server(typical a separate than your working laptop). Jenkins doesn’t know what kind of a codebase it’s gonna pull in, what kind of tools it is required, and how it built.
Click Manage Jenkins -> then click Global Tool Configuration
Build
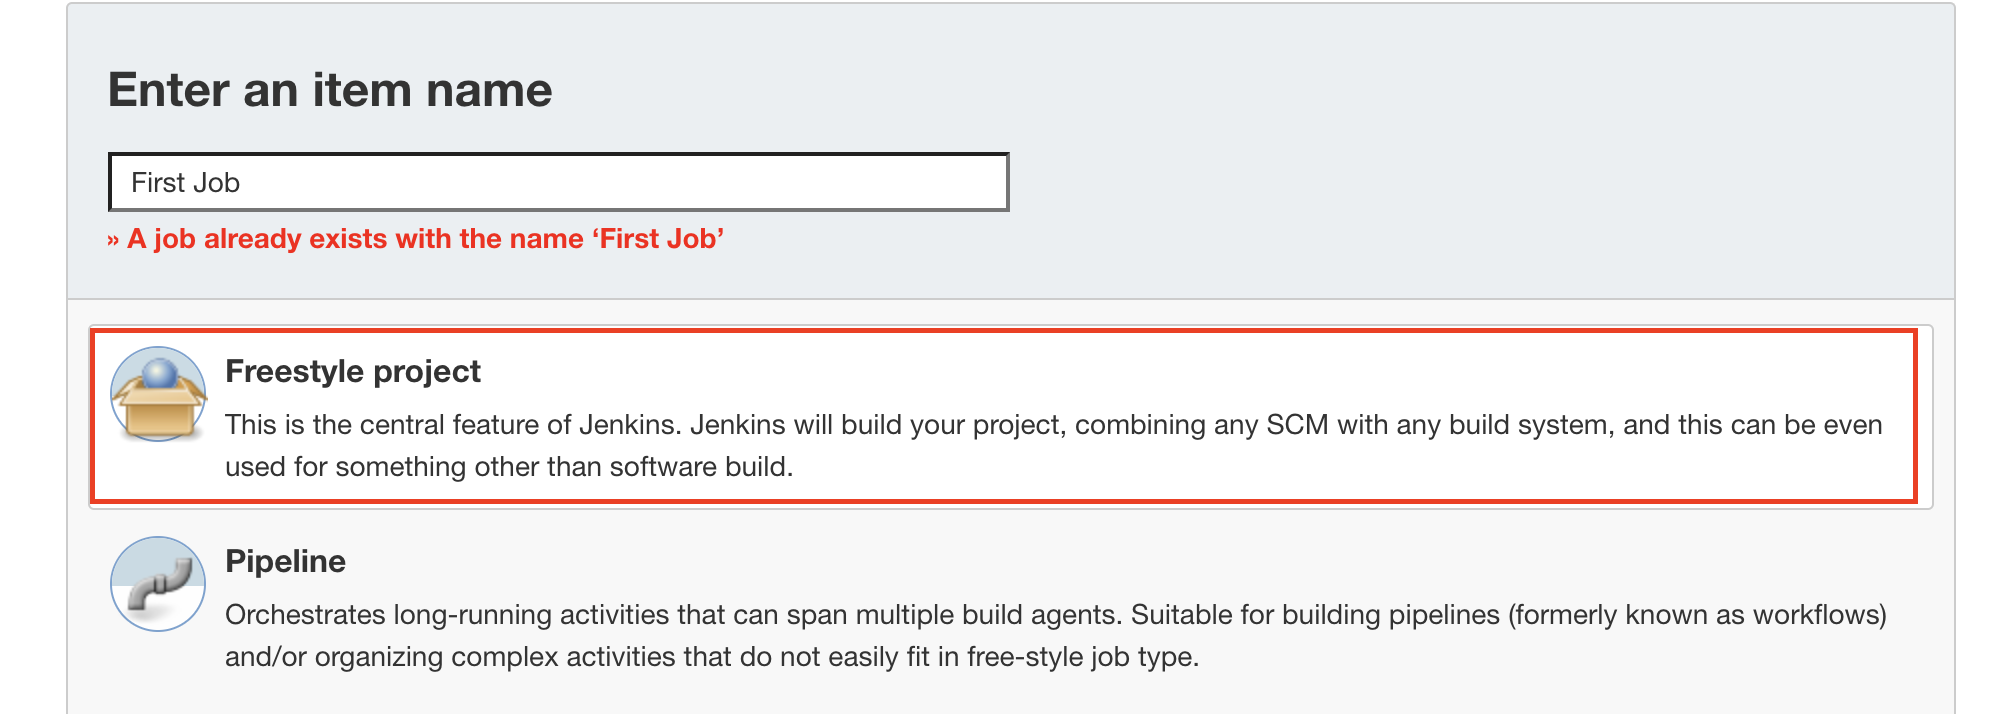
Click New Item -> type first job -> click FreeStyle Project
In build section, choose Shell Command

Then Go to First Job, click build Now and click the most recent build
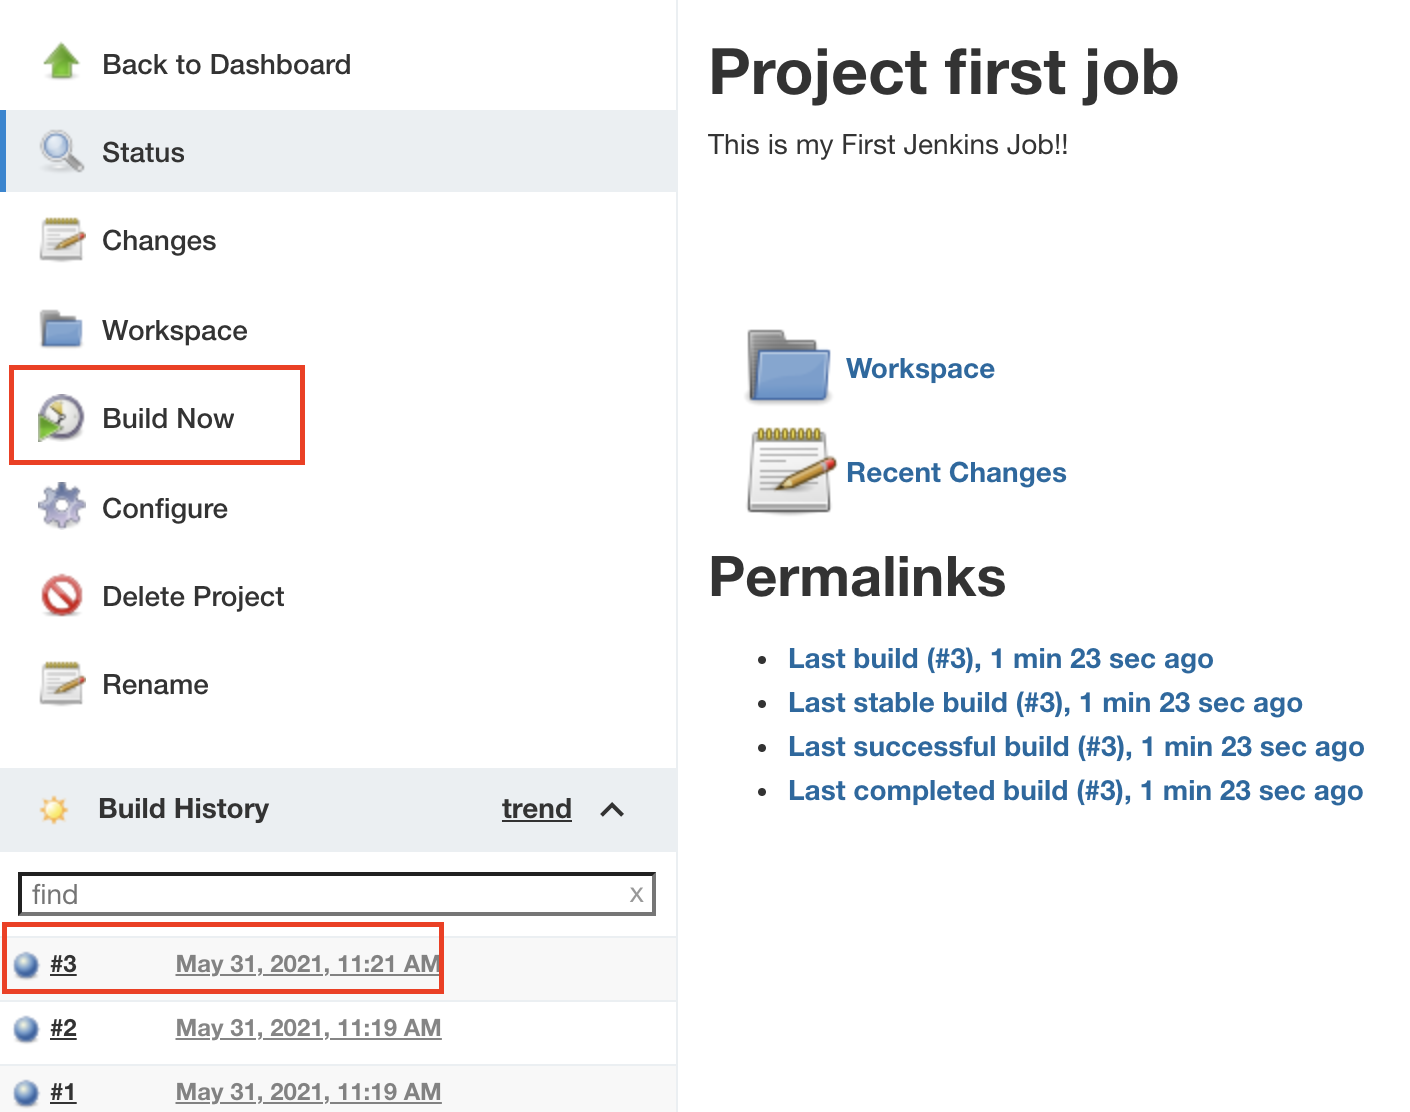
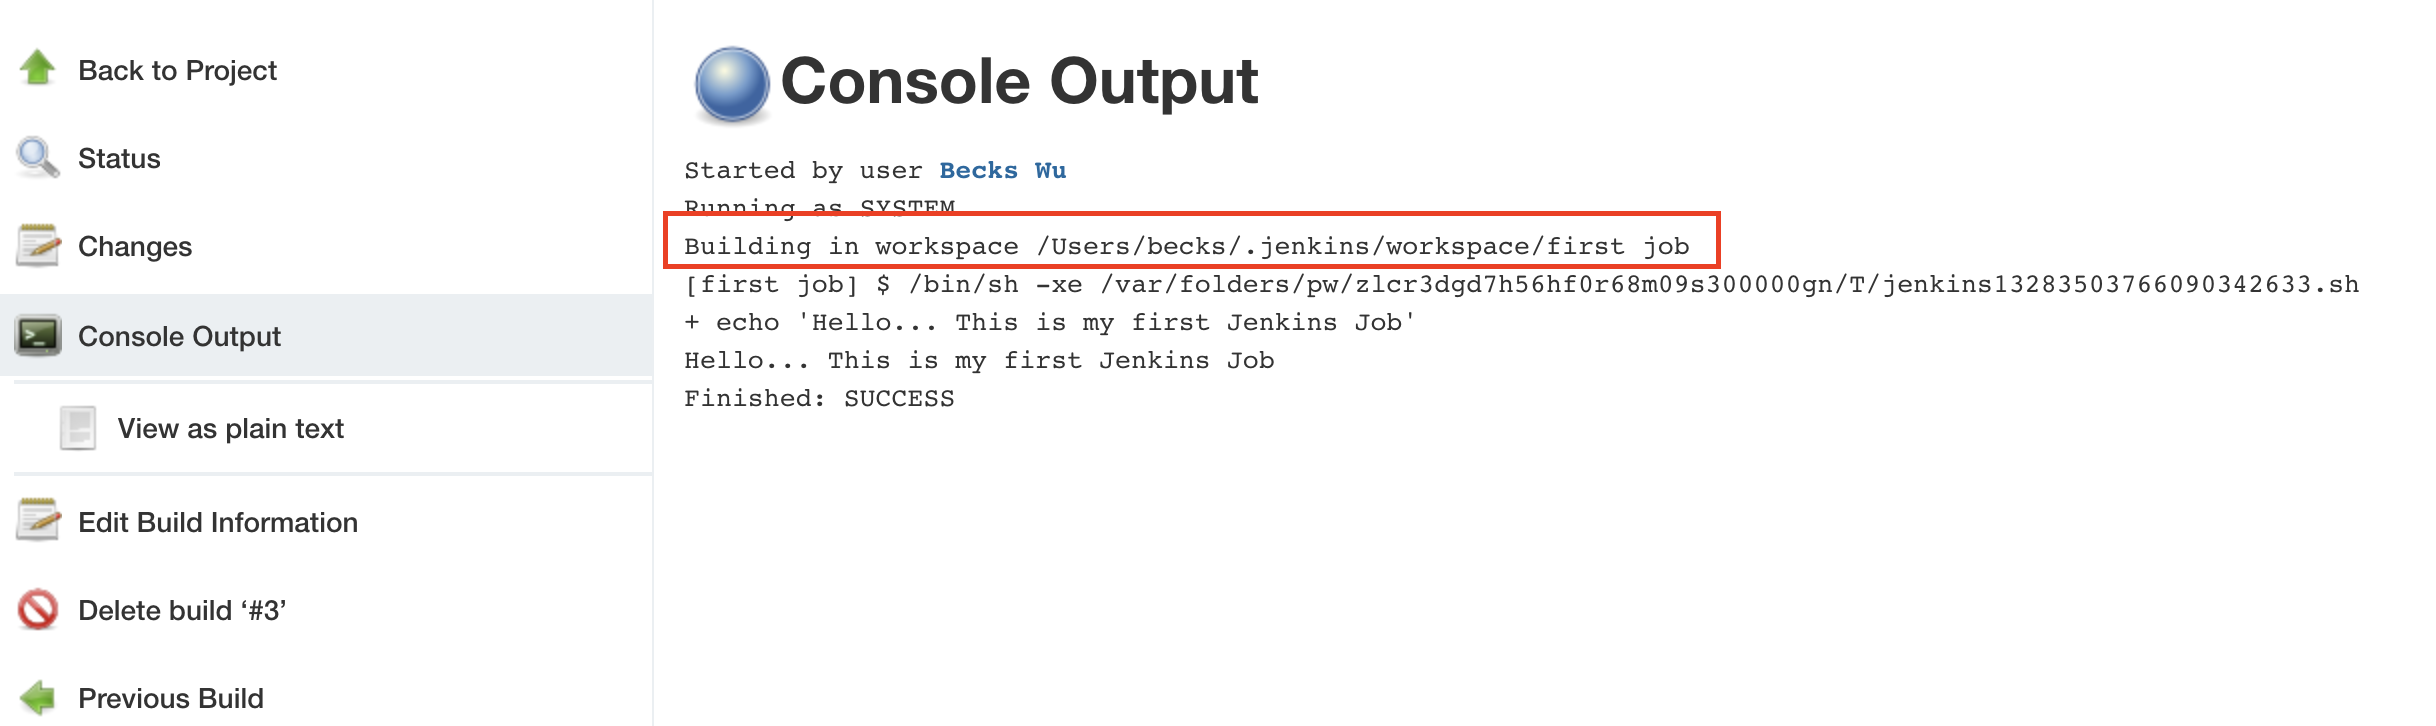
Then click Console Output. Job Details is inside the directory.
Build Trigger
Build every minutes
1.Click New Item -> type second job -> click FreeStyle Project
2.Add * * * * * in Build Tiggers and Build periodically section
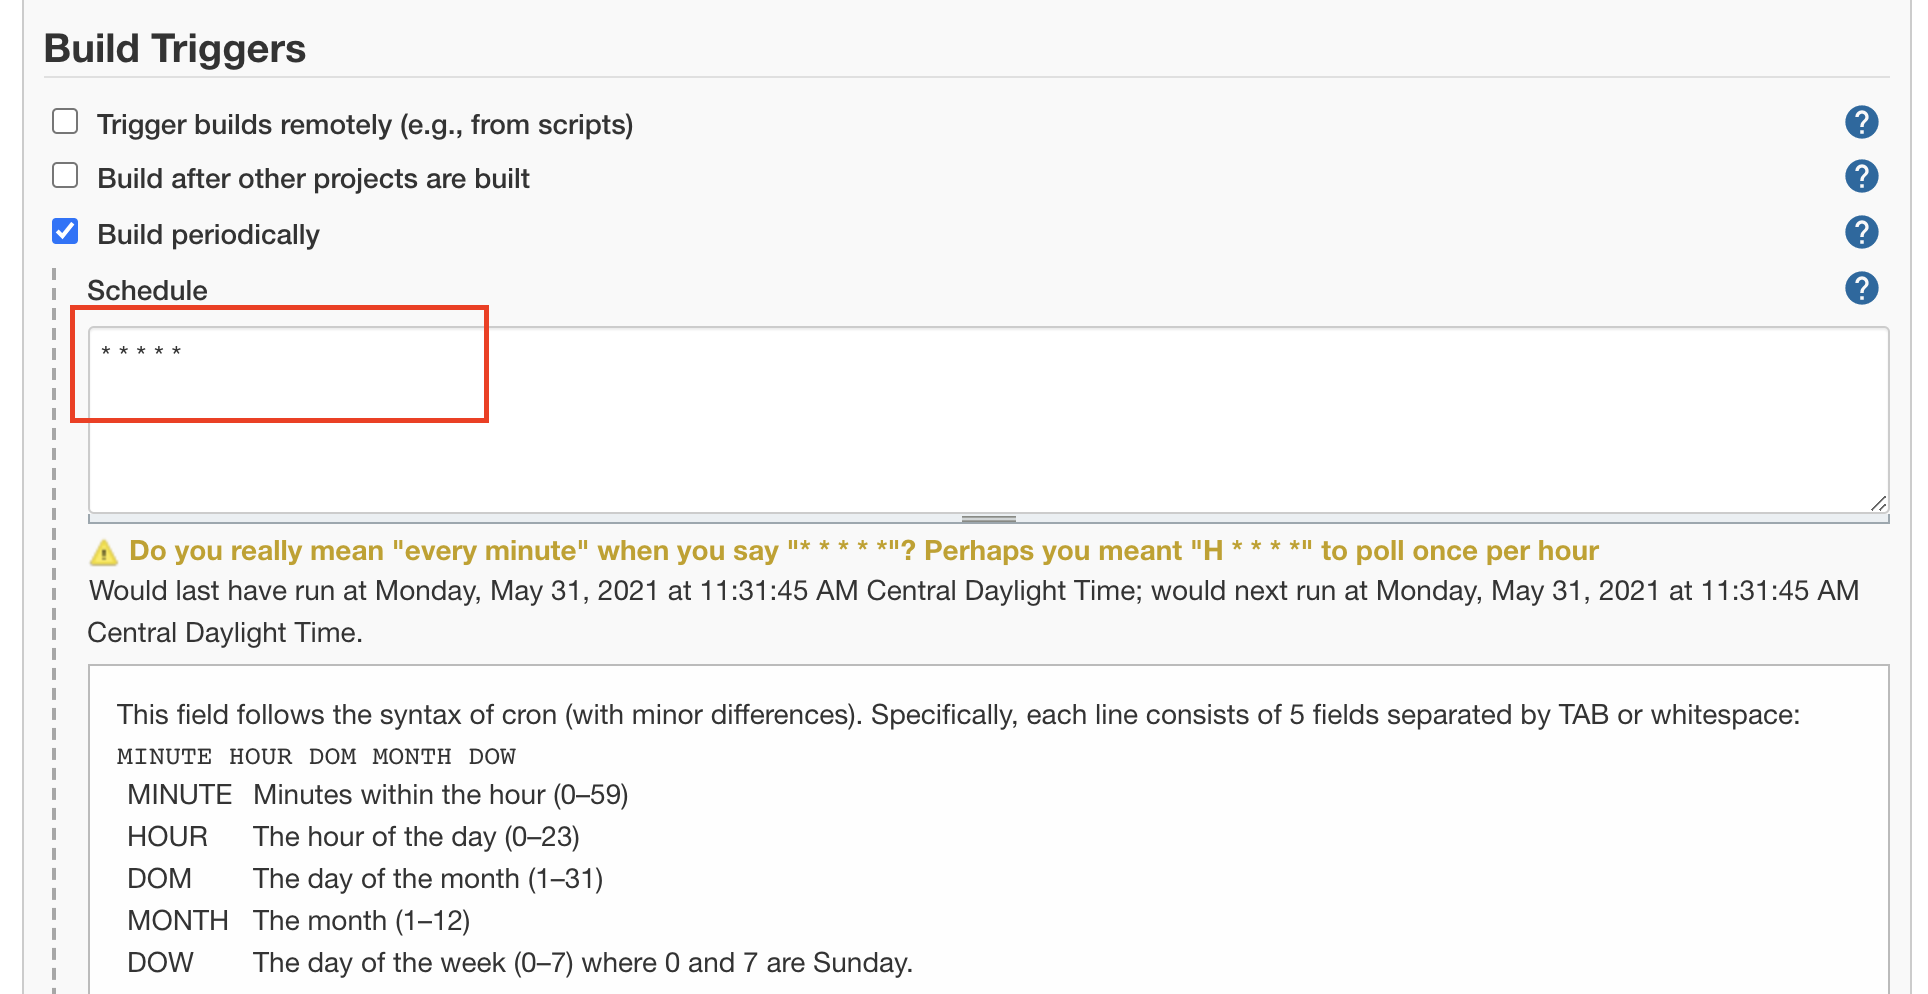
Click Save. Then each minute, it start a new building

Git Repo
Build every minutes
1.Click New Item -> type git job -> click FreeStyle Project
2.Go to Source Code Management -> click Git
3.Click Add then select your credential in the credential dropdown
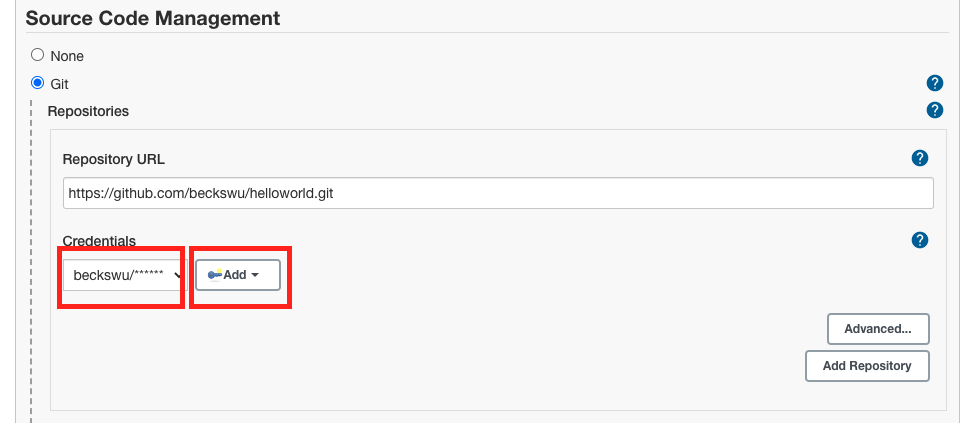
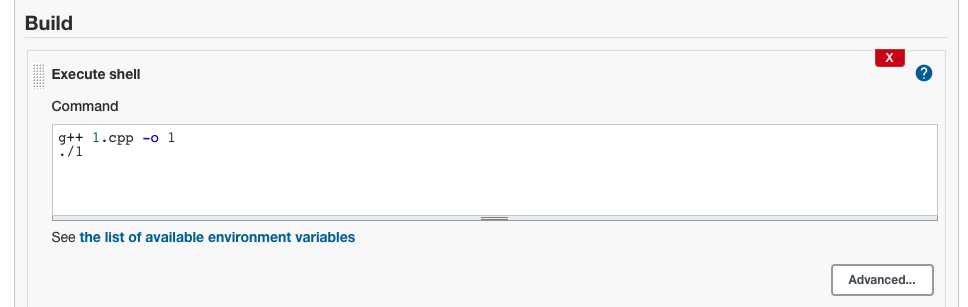
4.Go To Build, click Add build step, click add Shell command
5.Click Save. Go to project git job -> click Build Now -> click Console Output
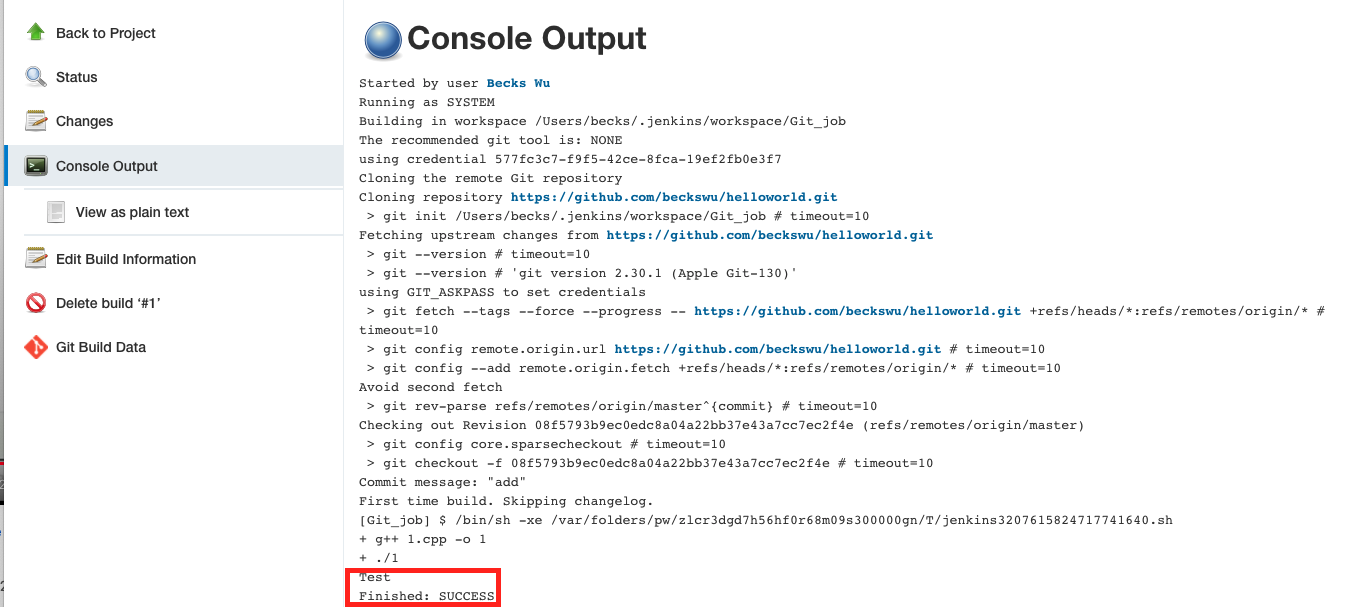
6.f click Workspace, the build is in at there.
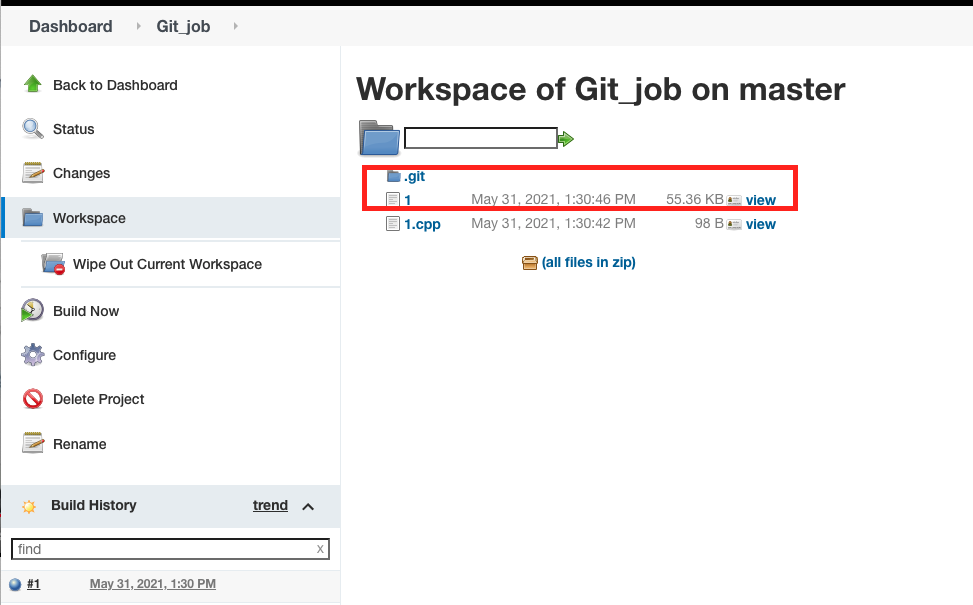
Plugins
click Manage Jenkins -> click Manage plugins
Distributed Build
- Case 1
You don’t want your Jenkin Server to go down. So have a server which is a placeholder for the master. So master take in all kind of jobs. So master will trigger to delegate these jobs onto some of the machines or some of slaves
- Case 2:
If have a Jenkins server that is running on a windows or linux. When you need to build based upon operating systems, you have multiple configurations to support. So that’s where master/slave comes into place.
Typically only has one Jenkins server to fonfigured with all the proper authorizations (user configurations and everythings is set up on this Jenkins server). The job of it is just delegation. It will listen to some triggers based on the jobs that come in. It can control lots of systems which may not have a complete or no need to put in a complete Jenkins installation. All have to do is to have a simple Runner/slave to run on a low priority thread to run these system.
So if any slave is down, then master will know and delegate task to someone else.
We choose JNLP (Java Network Lanuching Protocol to connect master/slave)
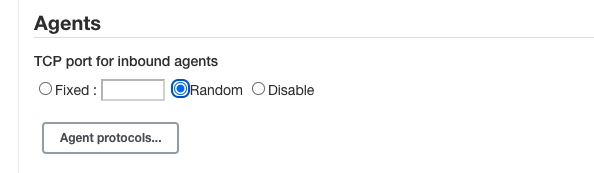
1.click Manage Jenkins, then click Configure Global Security.
2.At Agents section, click Random
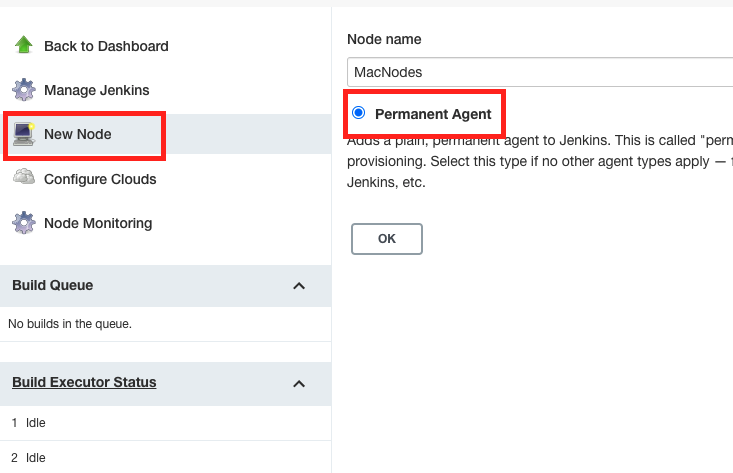
3.click Manage Jenkins, then Manage Nodes and Clouds.
4.On the left, click New Node, and select Permanent Agent
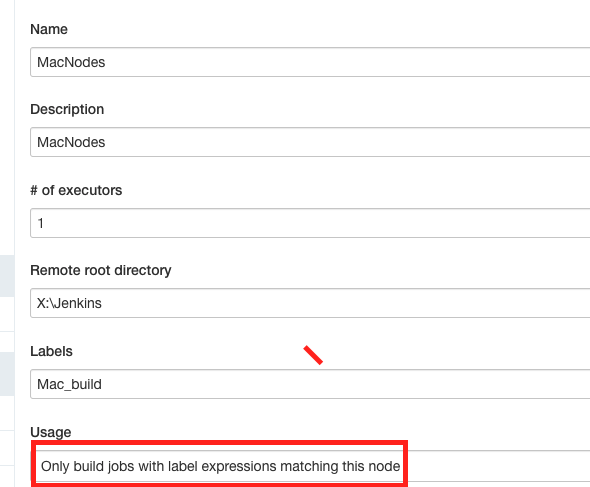
- Select Only builds withn label experessions matching this node at Usage dropdown. The label of this node is Mac_build.
Pipelines
written in Groovy script. Anybody can visualize your pipeline.
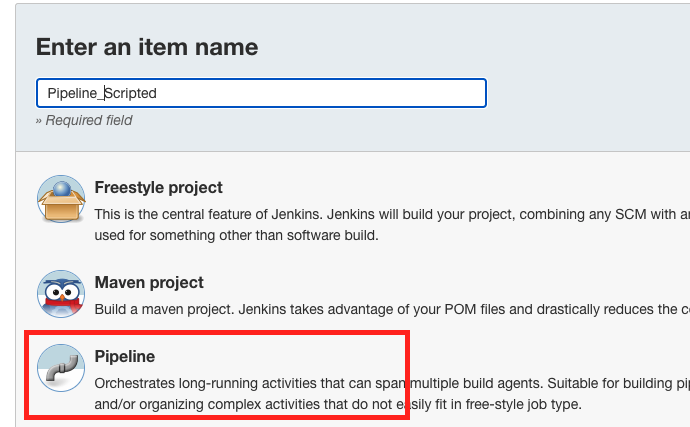
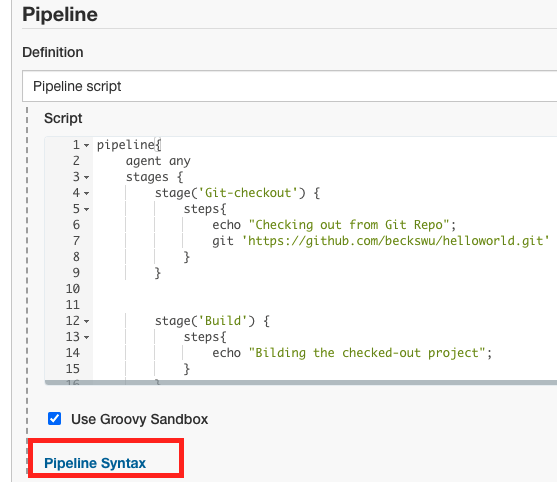
1.Go to Dashboard, click New Item -> click Pipelines
2.Go to Advanced Project Options, copy below scripts into it.
pipeline{
    agent any
    stages {
        stage('Git-checkout') {
            steps{
                echo "Checking out from Git Repo";
                git 'https://github.com/beckswu/helloworld.git'
            }
        }


        stage('Build') {
            steps{
                withEnv(['PATH+EXTRA=/usr/sbin:/usr/bin:/sbin:/bin']){
                    echo 'env.PATH=' + env.PATH

                    echo "Bilding the checked-out project";
                    sh('./build.sh')
                }
            }
        }

        stage('JUnit') {
            steps{
                echo "Junit Passed Successfully";
            }
        }

        stage('Quality-Gate') {
            steps{
                echo "SonarQube Quality Gate passed successfully";
            }
        }

        stage('Deploy') {
            steps{
                echo "Deploy Successfully";
            }
        }

    }

    post{
        always{
            echo 'This will always run'
        }
        success {
            echo 'This will always only if successful'
        }
        failure {
            echo 'This will always only if failed '
        }
        unstable {
            echo 'This will always run only if the run was marked as unstable'
        }
        changed {
            echo 'This will always run on if hte state of pipeline has changed'
            echo 'For example, if the Pipeline was previously failing but is now successful'
        }

    }

}
3.Click Pipeline Syntax
4.Select Sample Step as git:Git and add Repository URL and Click Generate Pipeline Script then it will generate checkout script
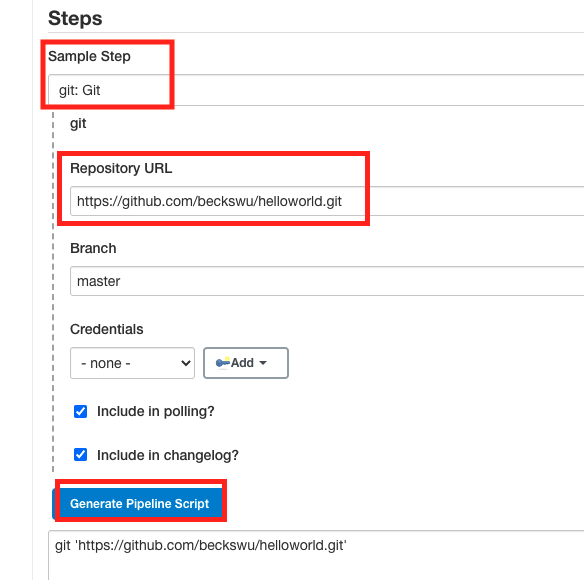
5.copy the checkout script into stage('Git-checkout') section
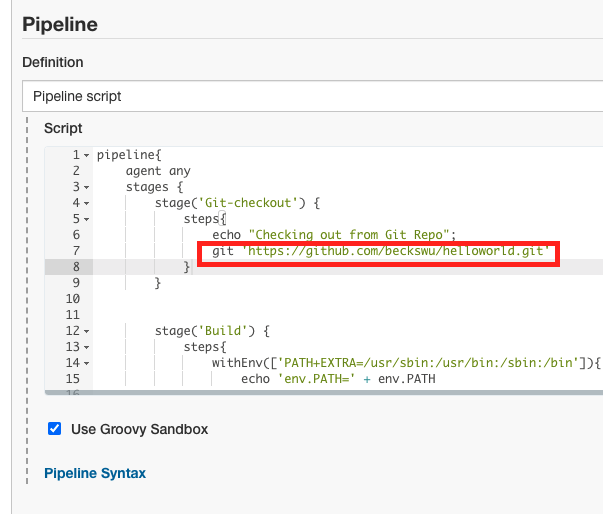
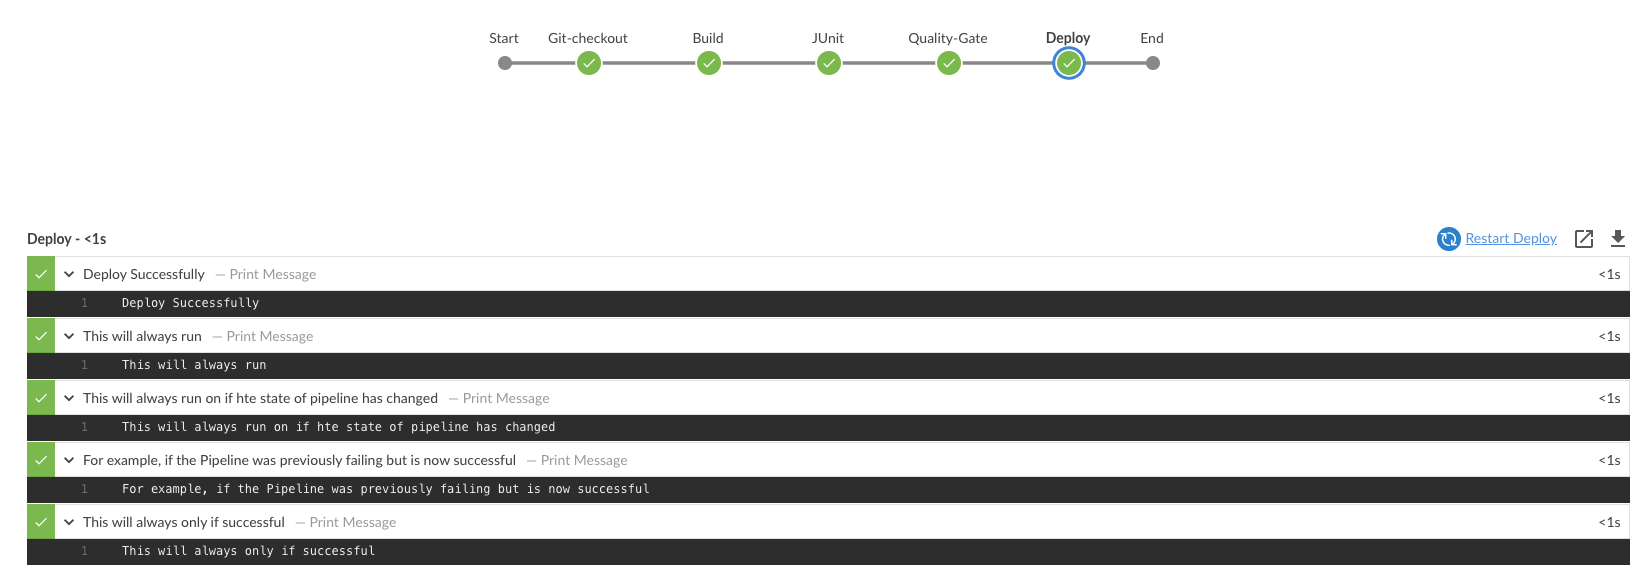
7.Click Save -> Click Build Now. It will show the pipeline
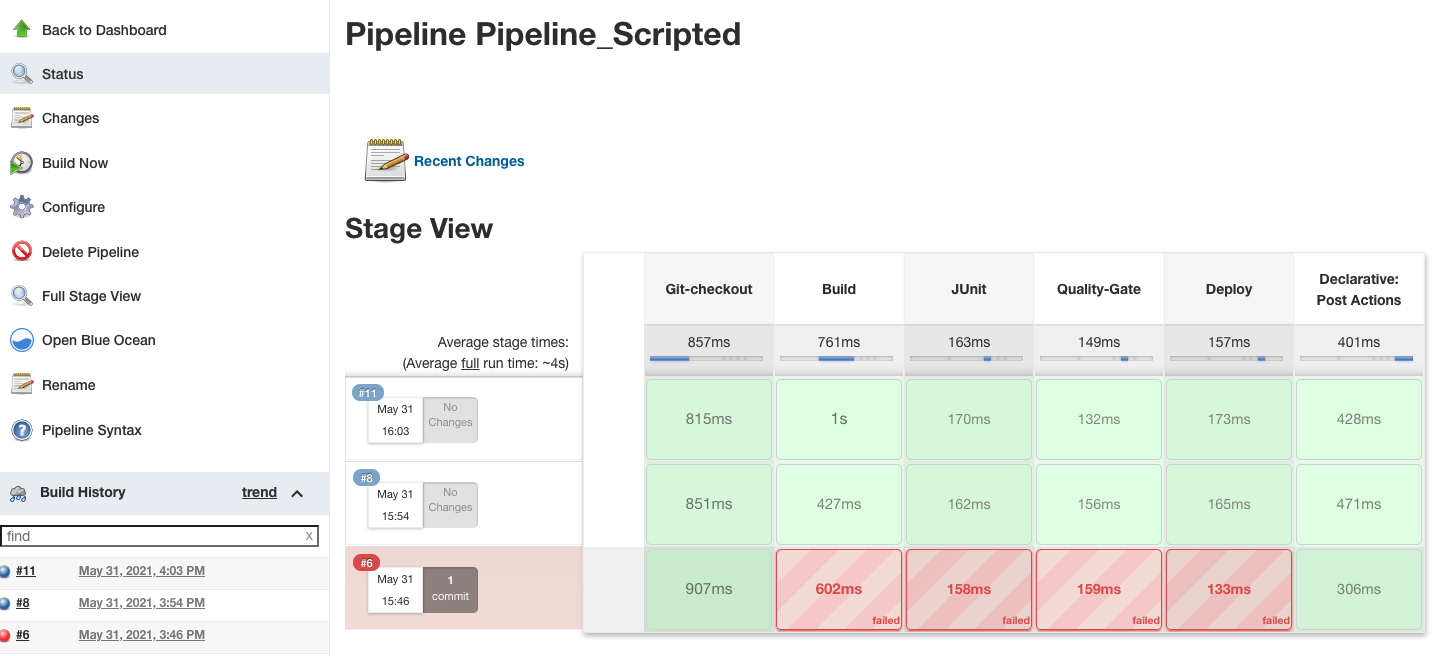
8.Click the build and view Console Output, it shows the scripts print
9.Click Ocean Blue, it shows each stage and display the message of each message from the script
Post-Build Action
After Git job, trigger first job.
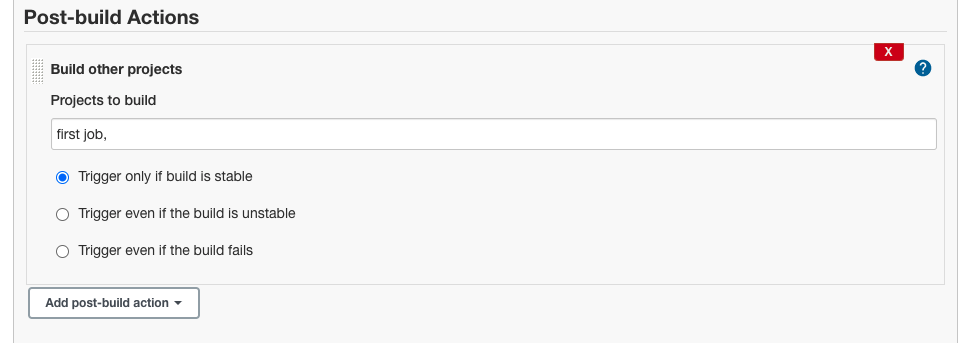
1.Go to Git job configure section, click Add post-build action.
2.Select Build other projects. Then click Save
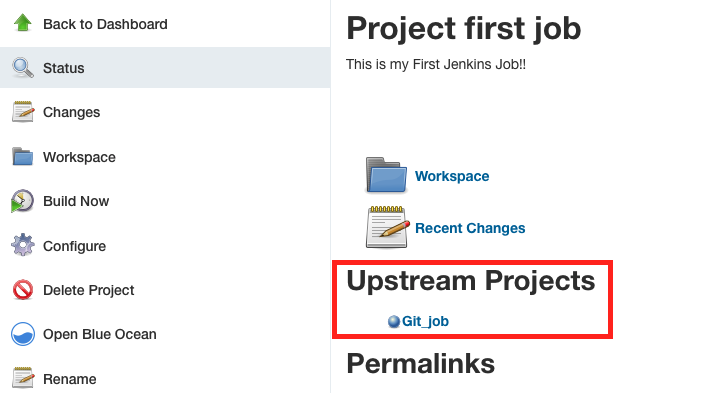
3.Go to first job, can see the Upstream Projects is Git job
But it is hard to see the flow which without visualization
4.Go to Manage Jenkins -> Manage Plugins -> search Delivery Pipeline Plugin -> install without restart
5.Go to Dashboard, click +

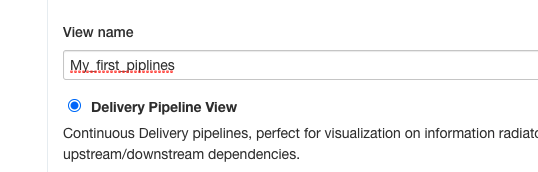
6.Type a View name and select Delivery Pipeline View
7.Only select Inital job as Git job. Because we defined the downstream job of Git job before.
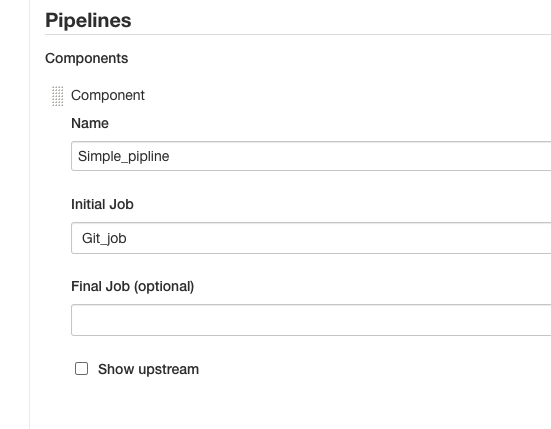
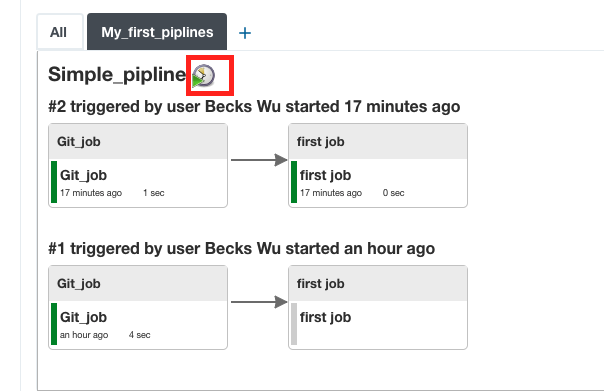
8.Then click OK. It shows a much better piplines
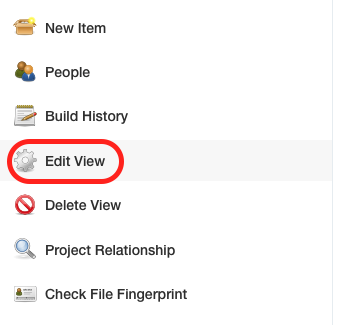
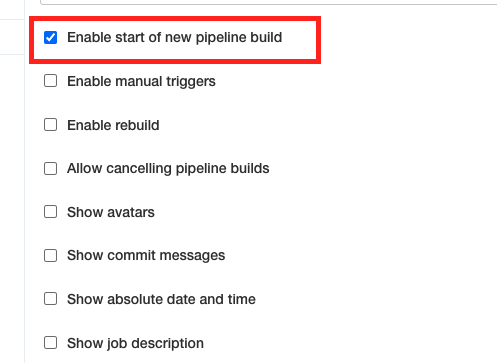
9.Could click Edit View on the left, and select Enable start of new pipelines build and click OK. Then there is button on the view to start the build